
How to Do it Yourself: Build a custom island or peninsula using RTA cabinets….
Ideas for building an island in your kitchen.
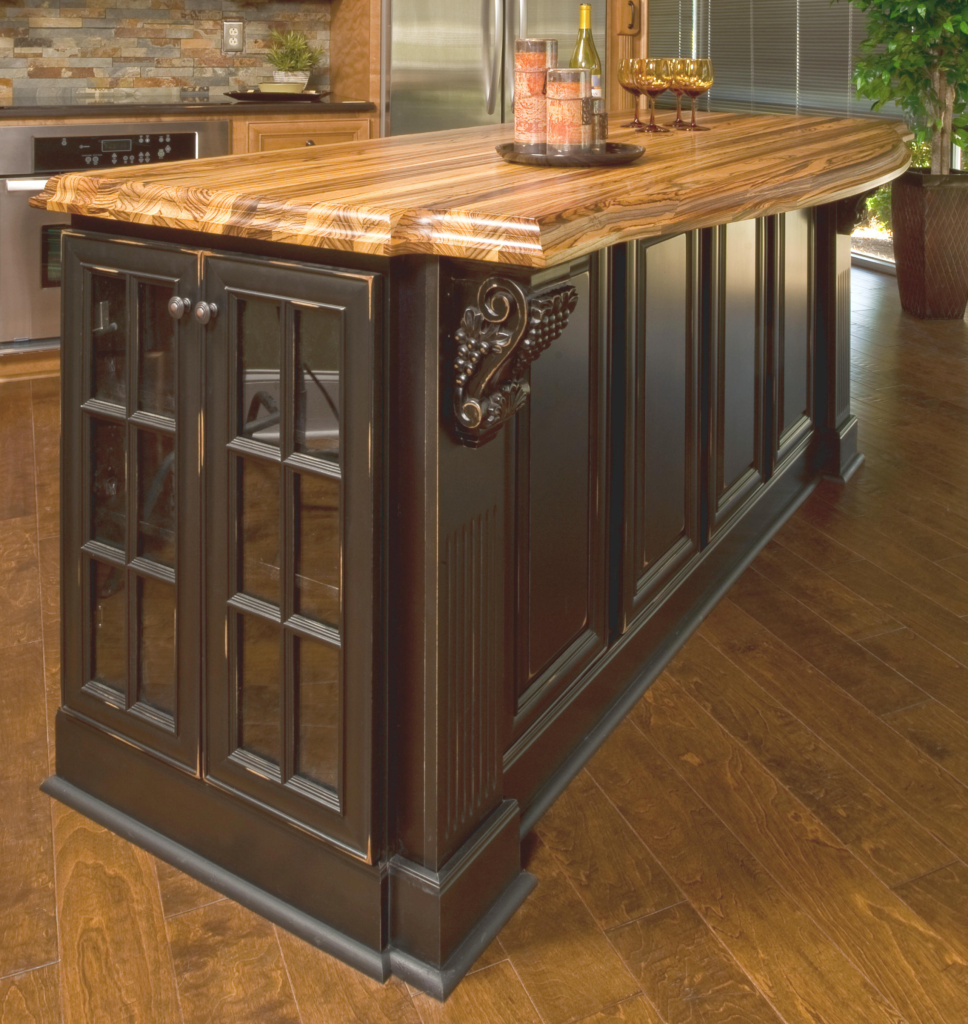

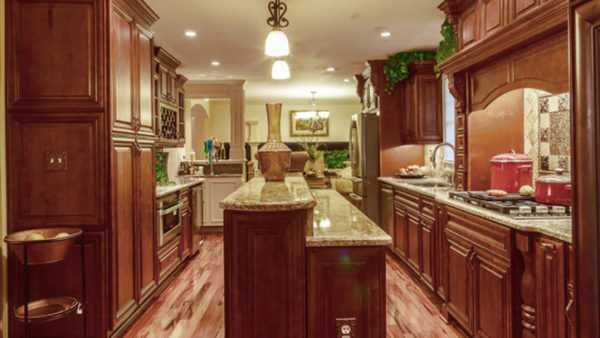
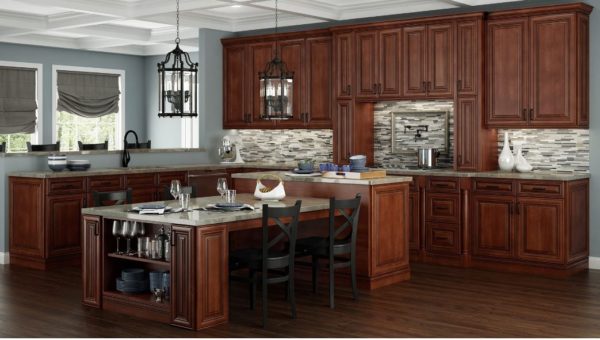
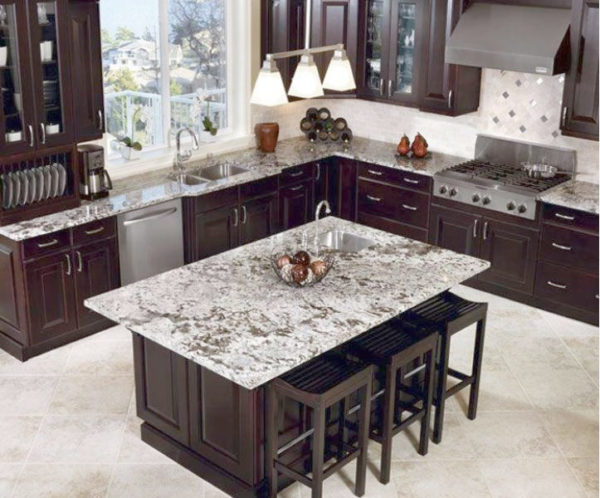
Just looking at the images above, you can see how we used different standard RTA cabinet parts to “build” a custom kitchen island. Panels, trim, doors or even just place standard base cabinets and cover the backs with panels. Many possibilities!
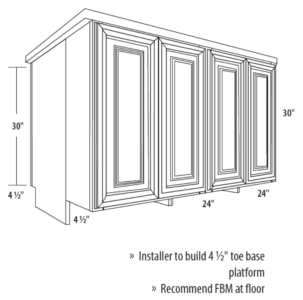
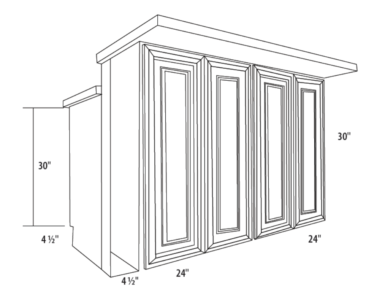
Extend the countertop and add storage:
You can add 30″ high wall cabinets to the back of base cabinets to build the island.
The countertop extends to cover the wall cabinets also. Build a platform to raised the wall cabinets up to the correct height and cover with toe kick at the bottom. We have panels for the sides.
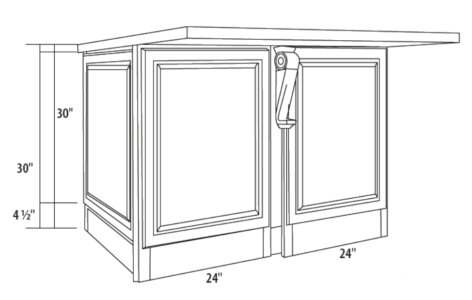
Raise the countertop and add storage:
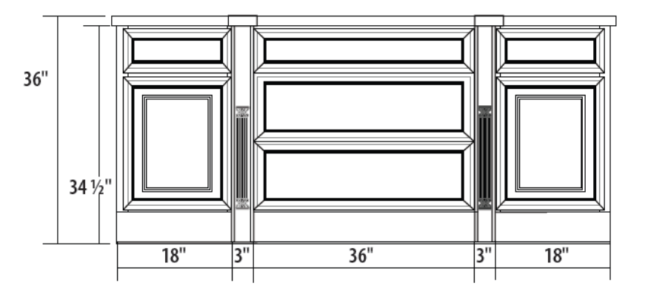
Add 36″ high wall cabinets to the back of base cabinets or a knee wall for matching raised counter area. Build 4-1/2″ platform to raise the wall cabinets to the toe kick height of the base cabinets
Panel the back of your island:
Use furniture base molding, FBM instead of toe kick for a distinct finish.
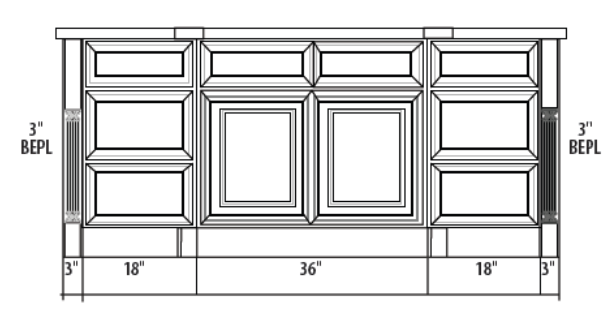
Apply base decorative end panels, decorative doors for an elegant look.
Create a simple veneer with outside corner molding.
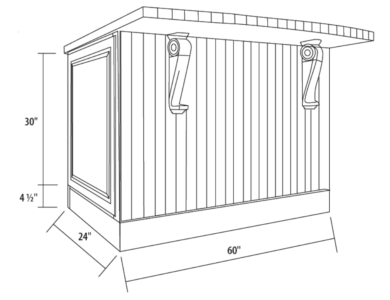
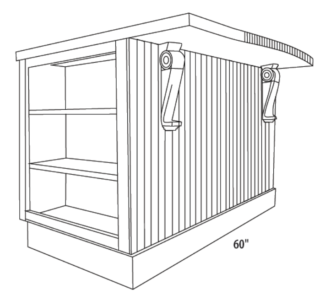
Cover the back of the island with bead board and outside corner molding.
Cover the back with plain panel or bead board and use 3″ filler to create a shaker look.
Don’t forget the decorative corbels as counter top supports.
Create an open bookshelf:
Use a wall cabinet 24″ x 30″ on the side of a base cabinet.
Leave the doors off the cabinet for open shelves.
Use a wall cabinet with glass doors for a custom look
Design and Decorate your island:
Specify decorative legs on either side of a center or at ends of your island.
Use 3” material behind your leg to connect to cabinets.
Use decorative corbels with a countertop overhang.
Create any size or shape island by combining cabinets of different sizes. Place a sink in your island, microwave or stove. Use the island for food prep or add a 12″ over hang on one side for seating.