Converting Raised-Panel or Flat-Panel Cabinets to Glass-Front Cabinets
What, How, Where & Why…
You’ve seen beautiful, illuminated glass-front cabinets, and wondered how they’d look in your tired kitchen. If you have raised panel or flat-panel cabinet doors, chances are you can convert some or all of them to glass-front cabinets.
The key word is panel. If you have a solid flat cabinet door — often referred to as a “slab” door — you’re better off purchasing replacement doors than trying to convert. Correction…you’re almost always better off buying replacement doors if you want to convert to glass-front. Better yet, new cabinets…but let’s not get ahead of ourselves. Your goal is to update/improve the look of your cabinets, and if you are the handyman (or handywoman) type, a do-it-yourself conversion might be do-able.

Back to the “panel” aspect. You really need to have a panel-type door. By “raised” panel, we’re referring to a typical Colonial/Queen Anne/Continental or even “Country” style. In recent years, raised panel cabinets have been the most popular, best-selling style. Some raised panel doors have an “arched” or “scrolled” top. In other words, a curved shape. These are significantly more difficult to convert, but certainly not impossible. You’ll just need a very steady hand with cutting and routering, and most likely will need to have the glass professionally cut.

A “flat” panel door is sometimes called a “recessed panel” door. These are better known as Shaker, Mission, Craftsman, or perhaps Art-Deco styles. Like a raised panel door, the outer part of the door “frames” a panel. Most cabinet manufacturers offer both types, although they really only manufacture a raised panel door with a flat panel back. By not drilling and hanging the door until an order is received, they can simply turn it around and “hang the door backwards” to fill a flat-panel order.
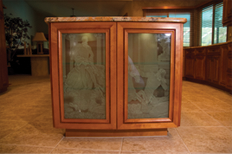
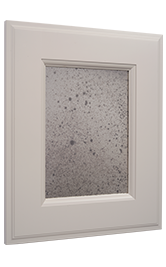
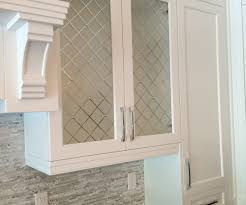
The reason you really need to start with a panel type door is that it creates a visual “frame” for the glass. By looking at the photos above, you can immediately see how the outer edge provides this frame effect. Fact is, this part of the door is called “the frame” by most cabinet manufacturers. To attempt a glass insert on a slab-type door without a visual frame, you will likely wind up with a weirdish early 1970s look at best. It is possible to create the “frame” effect by adding mitered molding of some sort around the glass area, but most likely you’ll wind up with something resembling a home hack job, which is precisely what it is. So for those of you with slab-type doors, no need to read any further.
How Many?
Chances are you’ve been looking at this project with the idea that you want to convert all of your cabinet doors. You might want to re-think that. First of all, lower cabinets are seldom appropriate for glass front doors. They’re prone to damage, and nobody is really inclined to bend down and squint to look at your marvelous pots and pans or cereal boxes through a glass-front cabinet. Next, pantry cabinets and other large format cabinet doors don’t really lend themselves to glass fronts. And finally, sometimes “less is more” applies to cabinets: By using glass fronts on just a couple of cabinets, perhaps as “book-ends,” you’ll not only accentuate the glass doors but also bump up the wood panel doors simply because they contrast so nicely.
Consider doing one prominent cabinet, or just end cabinets, and perhaps a corner cabinet first. See if the glass does indeed create a nice contrast with the remaining wood doors. If the effect isn’t enough, you can always go ahead and replace additional wood panels with glass.

Decorative glass replaces a standard door panel.
How to do it…
The process of obtaining glass varies, depending on how much acces you have to a variety of glass shops. For that reason, we skip ahead to actually doing it, assuming you can obtain glass. In any event, some glass-buying ideas, sources and pointers are listed at the very end of this article.
The first thing to do it remove one of your cabinet doors and look it over carefully. Figure out how it was put together…is the panel assembled tongue-and-groove into the frame? (Most are) If it isn’t tongue-and-groove construction, it could be that you have a simulated raised panel. In other words, you have a solid door in which the appearance of a panel has been cut into the face of the wood. If you do have this solid construction, you’ll need to skip down to the “One Piece Construction” section. Is it glued in solidly? Perhaps the glue has dried out…can you move the panel around within the frame? If so, it won’t be much movement, but it will make the job a LOT easier. If you can ascertain that the panel is loose within the frame, chances are you can remove it in one piece, and you’ll have a frame ready for glass.
If you believe that you can remove the center panel easily, take a router and remove the back of the frame groove as shown in the illustrations below. Set the router just deep enough to cut through the back part of the groove. Avoid cutting your wood panel if at all possible…you may decide someday to put the panel back in.
Once you’ve removed the back part of the groove, remove the panel. If it sticks, it means that it is glued in somehow. Try and remove the glue (not the panel!) with an X-acto knife. If you try to pry the panel away before removing the glue, chances are you will take part of the frame with it, and you’ll have a real mess. If you aren’t able to remove the wood panel fairly easily, you’ll need to read down and follow the instructions as if this were a one-piece door.
Once you’ve routered, “dremeled,” or otherwise cut away the back of the groove in the frame, clean the remaining area out thoroughly.
With the back of the groove removed, you’ve got something like the back of a picture frame. On a picture frame, you’ve got some way to hold the glass, matte, and artwork into the frame; usually clips of some sort. Same thing with your cabinet door…think of it as now a “frame” for your glass…and you need clips of some sort to hold the “artwork” in place. The easiest type is a simple plastic frame clip from a hardware store. These screw into the frame, then are turned “open” to allow the glass to be put in, then turned “closed” to hold the glass in place. Remember to drill a tiny hole for the screw, to prevent splitting the wood frame. You can see how this works in the photos and illustrations below. Another type of clip is a metal “screw down” frame clip. These are infinitely more costly than plastic clips, but infinitely nicer. The only word of warning is, if you screw them down too much, you’ll crack the glass for sure.
You should install these clips every few inches around the frame. Once you’ve done that, your frame is ready to accept glass. Take your frame(s) to your glass shop, and have the glass cut to fit the frame(s).
Once you obtain your glass, lower it into the frame and turn the clips. Carefully check to see if this holds the glass. If you’ve used top quality metal screw down clips, chances are you don’t need silicone. But most likely you will, particularly if the glass has any movement in the frame.
After the groove has been thorough cleaned and dried, and the clips screwed in, run a single bead of clear silicone caulk in the groove around the frame. GE’s “Silicone II” is generally suitable, although aquarium-grade silicone is best for this job.
As soon as you have finished laying down the bead of silicone, press the pane of glass into the groove. You want to press it in so that the silicone mashes for maximum surface area. If it spurts out through the front, no worries — simply wait until it is fully cured and cut it away carefully with an x-acto or razor blade.

Above: cross-section of the finished assembly, glass held firmly in place with silicone and plastic tab frame clips.
Some Caveats…
Remember, this is not guaranteed to work. As far as setting the depth on your router, be conservative. Like the barber, you can always cut off more, but you can’t put any back. If your center panel does not remove easily, the cutting option shown above is not necessarily a good option. Sometimes even a skilled carpenter botches this job.
ALWAYS HAVE A “PLAN B” in case you really foul things up. HINT: use a “spare” door to practice on, that is, a door that can be discarded or replaced easily.
Remember also, this website is not a guide nor guarantee. It is provided for informational purposes only, and you are responsible for your own actions.
Last but not least: No matter how capable you are, unless you can easily “pop-out” the center panel once you remove the back half of the groove in the frame, it is not likely that you will be 100% satisfied with the end result.
Ideas on Buying and Installing Glass
Unless you are very skilled and practiced at cutting glass, it is best to have it done at a professional glass shop.
Many glass shops will also install the cut glass for you in your doors after you have removed the panels.
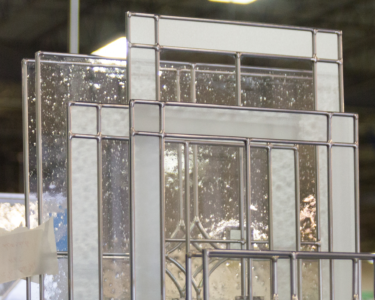
As far as the glass itself if concerned, your possibilities are limited only by your imagination. If you are putting glass fronts only on the cabinet with your nicest glassware or china, consider a very clear glass that shows it off nicely. This need not be plain plate glass; there are numerous patterns, bubble effects, crackled glass, ribbed, faceted, you name. If you are working with an Arts & Crafts style kitchen, you might opt for slag or colored glass. If you have a highly modern kitchen, you might even want a rich black glass. If you have a country style kitchen, you may even try tin or copper


